How to Clean the Camera Lens on a Print Inspection System Safely?
For a modern print inspection system, lens quality is a crucial factor that impacts the overall effectiveness of the print inspection process, whether the operator inspects barcodes, registration marks, or print quality – a clear image from the camera is needed for 100% inspection.
However, in real-life conditions of industrial printing, the camera lens becomes contaminated rather quickly. Dust from the printed paper, ink mist, coating particles, and fingerprints can collect on it. At first, the image can become blurry, and then the system will start skipping some defects or rejecting good prints.
The cleaning of the lens can seem easy; however, many people clean it improperly using harsh methods, damaging the lens coating irreversibly.
Here’s how to clean it safely and keep your print inspection system performing accurately.
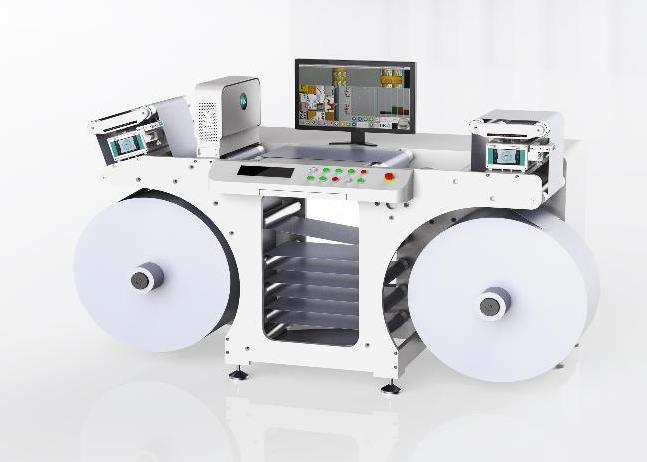
Table of Contents
Preparation – What You Need & What to Avoid
Gather the necessary equipment before cleaning your lens; using the wrong equipment may damage your lens even more.
What You Will Need:
- Air blower (preferably manual bulb blower)
- Lens cleaning solution (special optical solvent)
- Microfiber lens cleaning cloth
- Lens cleaning tissue (lint-free)
- Anti-static gloves
- Soft brush (in case of stubborn dust)
This equipment is specially developed for optical surfaces and will protect the lens coating.
To be Avoided:
Printing facilities often commit the mistake of using ordinary cleaners. These include:
- Paper towels
- Ordinary cloths
- Industrial-grade alcohol containing impurities
- Canned compressed air (may release liquid propellant)
- Bare fingers
Use of paper materials and coarse fabrics may result in scratching on the lens. Poor quality solvents will cause residue build-up, while direct contact with the lens itself is sure to add oil.
The importance of having proper equipment for the Print Inspection System should not be overlooked.
Step-by-Step Guide to Cleaning the Lens Safely
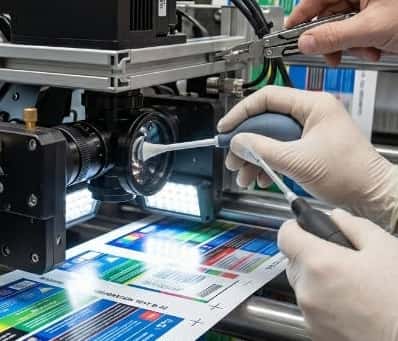
Cleaning a camera lens should always follow a careful process. Here’s the safest method.
Power Down and Isolate
Before starting, always shut down the inspection system completely. This is important for two reasons:
- First, it protects the camera electronics from accidental damage.
- Second, it prevents moving parts from operating while you clean.
If your Print Inspection System is integrated into a live production line, lock out the machine to prevent unexpected startup.
Wait a few minutes for the system to stabilize before accessing the camera housing. Safety should always come first.
Blow Away Loose Debris
Avoid wiping the dry lens that is covered with dust particles. The dust particles found in the print shop usually consist of tiny pieces of sharp grits from the paper or solid ink residues. By wiping, you force the dust to get embedded in the glass.
With your hand-held rubber air blower or optical compressed air can, position the opening slightly tilted about 2 to 3 inches away from the surface of the lens. Blow short bursts of air from the center outwards of the lens. It will successfully clear off the loose dust particles on the surface of the lens.
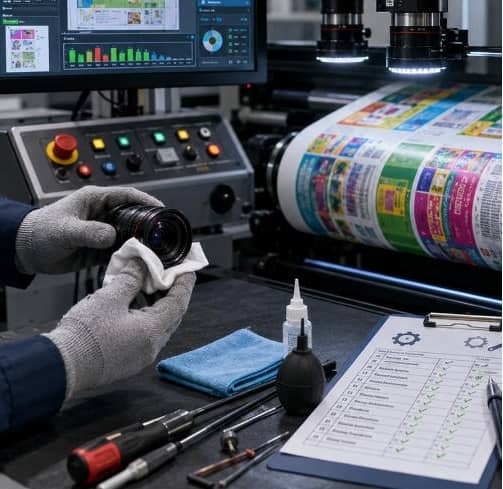
Apply the Solvent Correctly
Perhaps the biggest mistake one can make is to apply the lens cleaner directly onto the lens.
Rather, you should always:
- Put some drops of the lens cleaner onto a microfiber cloth or lint-free tissue paper.
- Only put enough to make the cloth moist.
Putting a solvent onto the lens directly may result in it seeping into the lens assembly or camera body, which may damage the internal components.
Optical-grade lens cleaners are fast-drying and don’t leave any residues; therefore, they are good candidates to clean cameras used in the Print Inspection Systems.
In case there is ink mist or adhesive contamination on the surface of the lens, you may let the moist cloth sit on the contaminated spot for a few seconds.
The Gentle Wipe
Place the moistened cloth against the lens. Begin right at the middle of the lens, and carefully wipe in an outward spiral path towards the edges of the lens.
The amount of pressure to apply is very light so that the solvent dissolves the ink smudge on its own accord. Wiping in circles or spirals will ensure that all the contaminants are wiped out from the center of the lens towards its edges. If there are still streaks left, wipe again using a new part of the microfiber cloth.
Common Pitfalls to Avoid in Printing Shops
Even experienced operators make mistakes when cleaning inspection cameras.
Here are some common pitfalls:
- Cleaning Too Frequently: Over-cleaning can wear down protective lens coatings. Only clean when contamination affects image quality.
- Using Excessive Force: Scrubbing hard does not clean better. It increases the risk of scratches.
- Ignoring Environmental Controls: If your print shop has excessive dust or ink spray, lens contamination will return quickly. Improving ventilation and shielding can reduce cleaning frequency.
- Skipping Regular Inspection: Don’t wait until inspection errors occur. Make lens checks part of routine machine maintenance.
- Using General-Purpose Chemicals: Industrial cleaners may contain additives harmful to optical coatings.
For any Print Inspection System, always use optical-approved products. These small mistakes can reduce system lifespan and compromise 100 print inspection consistency.
Final
Maintaining the lens of the camera clean is among the easiest and yet most crucial aspects of the Print Inspection System.
A clean lens results in sharper pictures, reduced instances of false rejections, and accurate defect detection.
Using the right process to do this—turning off the camera, removing debris, using solvents properly, and gently wiping—will ensure you get a longer lifespan out of the camera.
This is especially critical for those companies that utilize 100 % print inspection.