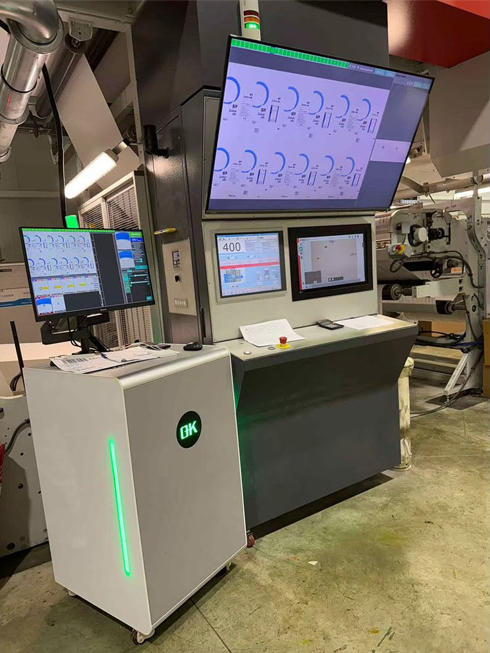
How to Calibrate and Maintain 100% Print Inspection Systems
100% print inspection systems let manufacturers inspect every single printed product in real time and catch defects, before those items reach customers. But to keep inspection accuracy steady and also maintain long term reliability, proper calibration and maintenance for the print inspection systems is critical. If calibration is skipped or preventive upkeep is treated as optional, even the most advanced inspection systems can trigger false alarms, miss real defects, or run into unexpected downtime. This article talks about how to calibrate and maintain 100% print inspection systems effectively so them keep optimal performance.
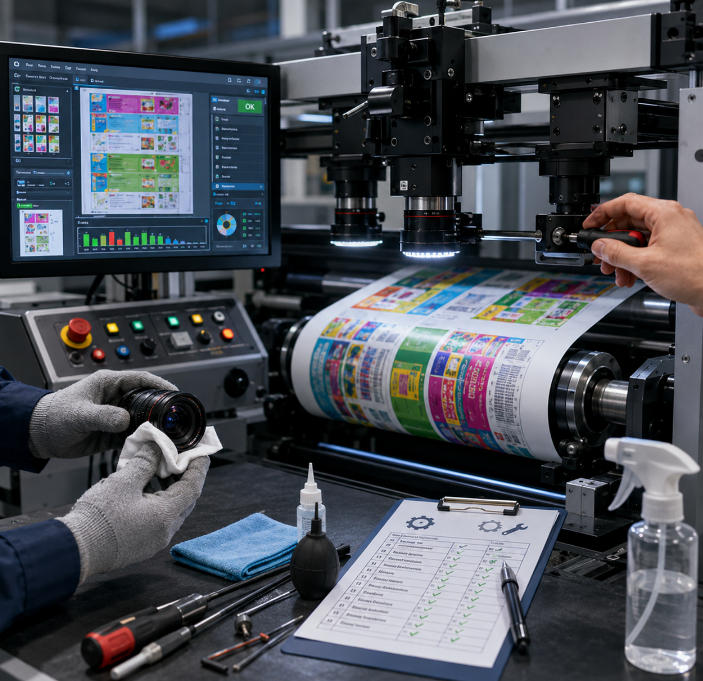
Table of Contents
Why Calibration and Maintenance in Print Inspection Systems are Important
Calibration makes sure the 100% inspection system measures colors, dimensions, registration, and image quality precisely, based on predefined references. When calibration is done right, the system can separate acceptable print deviations from actual defects, and that difference is where a lot of value comes from.
Maintenance plays a role in keeping printing inspection systems stable and efficient. Since print inspection equipment usually runs continuously in demanding industrial surroundings, parts like cameras, the lighting setup, optical elements, and the software itself need regular attention, so performance does not quietly degrade over time.
When calibration and maintenance are done properly, they bring a few clear upsides, like:
- More precise defect discovery
- Fewer false rejections
- Better production efficiency
- Longer service life for the equipment
- Lower operating expenses
- More consistent product quality
- Reduced machine downtime
Key Components of 100% Print Inspection Systems that Require Calibration and Maintenance
| Key Component | Primary Function | Calibration Requirements | Maintenance Requirements |
| Cameras | Capture high-resolution images of printed materials | Focus adjustment, image alignment, resolution verification | Lens cleaning, mounting inspection, cable checks |
| Lighting System | Provides stable illumination for image capture | Brightness calibration, uniformity adjustment, angle optimization | Cleaning light covers, replacing aging LEDs, checking power stability |
| Optical Lenses | Ensure image clarity and sharpness | Focus verification and optical alignment | Dust removal, scratch inspection, protective cover cleaning |
| Image Processing Software | Analyzes images and identifies defects | Sensitivity tuning, golden image setup, threshold adjustment | Software updates, database backup, parameter verification |
| Color Inspection Module | Monitoring color consistency and accuracy | Color reference calibration, tolerance adjustment | Sensor cleaning, periodic recalibration |
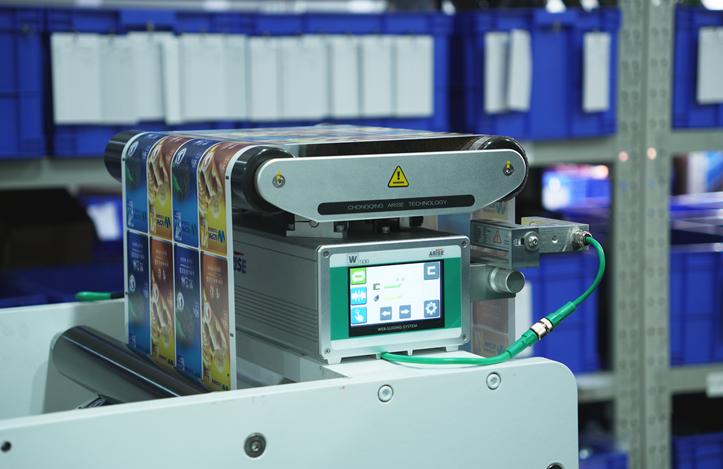
| Encoders | Synchronize image capture with web movement | Signal accuracy verification and synchronization adjustment | Inspection of wiring and rotating components |
| Sensors | Detect registration marks and trigger inspection timing | Position calibration and trigger sensitivity adjustment | Cleaning and alignment checks |
| Computer Hardware | Processes and stores inspection data | System configuration verification | Cooling system cleaning, storage monitoring, hardware inspection |
| Conveyor or Web Handling System | Maintains stable movement of printed substrates | Alignment and speed synchronization checks | Tension inspection, roller maintenance, vibration control |
The Complete Process of Calibrating 100% Print Inspection Systems
1. Getting The inspection Systems Ready before Calibration
Before starting the calibration step, the 100% full-surface inspection systems and the printing environment need to be set up properly. The printing press should be running in steady production mode, because changes in web tension, vibration, or substrate motion may shift the calibration results, even if only slightly.
All optical parts, meaning camera lenses and protective covers should be cleaned with care to get rid of dust, ink mist, and leftover debris. When the optics are not clean, the images collected during the run can become warped, and the inspection accuracy can take a hit.
Operators should also confirm that every cable, lighting unit, sensor, and mounting structure is secure, and working as intended. Conditions around the room, like temperature and ambient lighting, should stay consistent through calibration, otherwise the output may look uneven or unreliable.
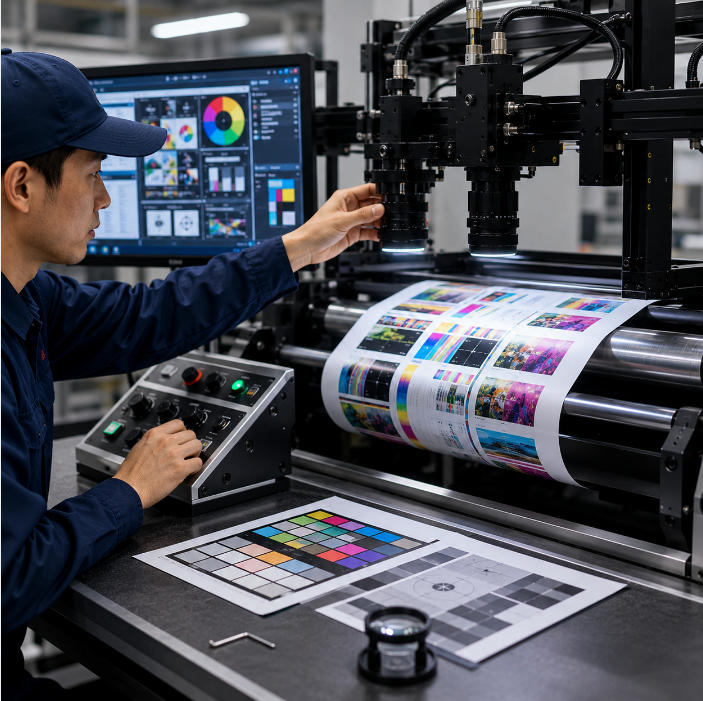
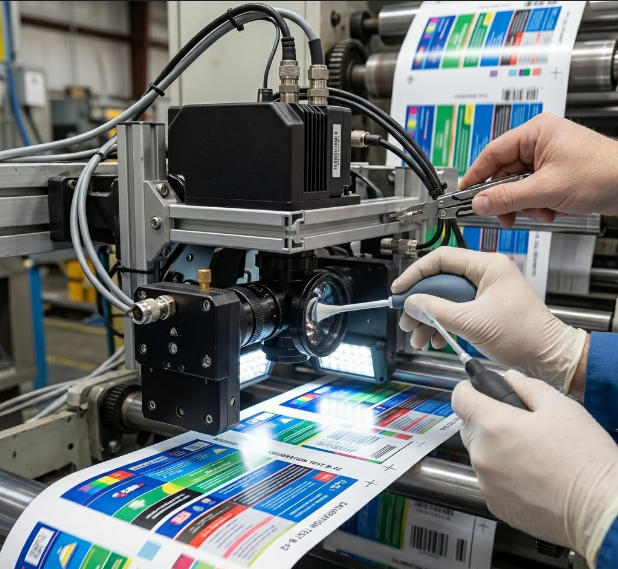
2. Camera Calibration
The camera system is the foundation of the whole print inspection process, because it captures those images that later become the base for defect analysis. Proper camera calibration starts with accurate positioning, and yeah it matters more than people think.
The camera needs to be aligned carefully with the printed substrate so the inspection region is taken in fully and without distortion. If the alignment is off, you can end up with skewed images, incomplete coverage for inspection, or measurements that end up being a bit off .
Once it is placed, the focus has to be tuned to get sharp, detailed images. Good focus is critical for spotting fine print defects like micro text issues, small spots, or those thin streaks. Calibration targets or printed test samples are commonly used to validate sharpness, so you can be confident the view is crisp.
Image resolution also needs to fit the inspection requirements of the application. Higher resolution settings are especially important when the task demands detailed defect detection, including on pharmaceutical labels, electronic components, and security printing.
Field of view adjustments are another crucial part of the camera calibration. The setup must capture the full print area while keeping enough image detail for inspection to be accurate.
3. Lighting Calibration
The lighting conditions really influence image quality and how clearly defects show up. Even when advanced image processing software is used, it can not truly fix bad illumination. So proper lighting calibration matters a lot for inspection accuracy.
The lighting system has to deliver steady and even brightness across the whole inspection region. Any variations in light can change contrast levels, and also make inspection outcomes inconsistent. During calibration, operators tune the brightness until the image looks clear enough, without too much glare or harsh shadows.
Lighting angles matter almost as much, since each substrate reflects light in a slightly different way. Glossy materials, metallic surfaces, and textured areas can need particular lighting arrangements. This helps reduce glare, and at the same time makes flaws easier to spot.
Uniform lighting distribution also needs to be checked with attention. If illumination ends up uneven, some parts of the print can look darker or brighter. That shift can disturb defect detection results, and then the inspection becomes unreliable.
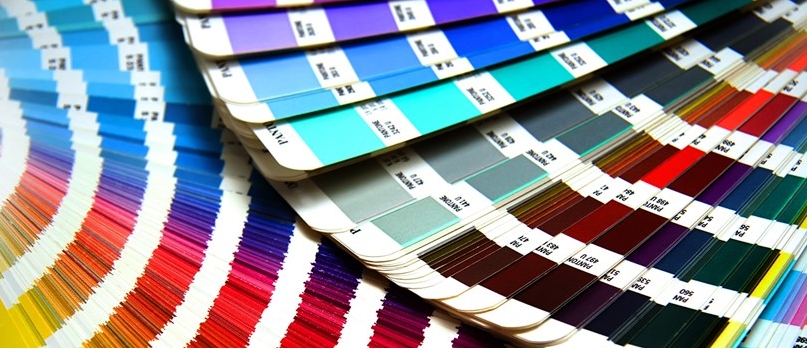
4. Color Calibration
Color consistency stays one of the most important quality goals in the printing industry. Many 100% print inspection systems include improved color inspection features, they compare the printed colors against approved benchmarks or standards.
Color calibration is usually done with certified color targets or approved reference samples. The system captures the print colors, then it compares them to target values. After that, it decides whether the colors remain inside allowed tolerances.
Tolerance settings really need to be tweaked carefully when you do calibration. If the tolerances end up extremely tight, you may trigger extra false rejects , but if they are too broad then the defective products could slip through inspection.
Environmental stability also matters a lot for color calibration, because temperature and lighting conditions can shift how people perceive color. Regular verification is a good habit so the color accuracy stays consistent across the whole production run.
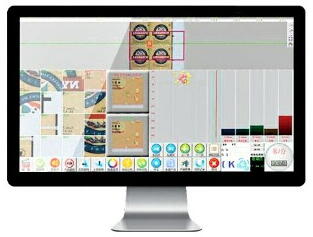
5. Software Calibration and Parameter Adjustment
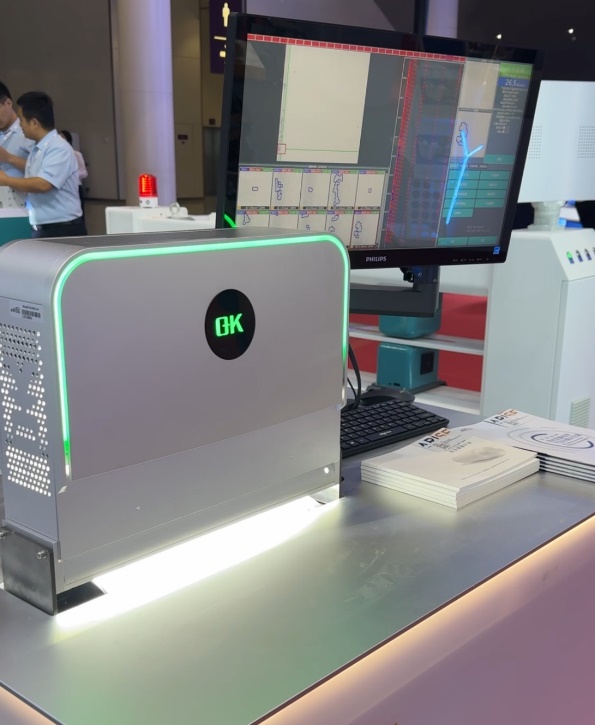
The software manages the defect detection algorithms, and it decides how inspection outcomes are read. Getting the software calibration right is essential so detection sensitivity remains balanced with production efficiency.
The process usually starts by making a “golden image”or master reference image. This image represents an approved high-quality print sample and it becomes the baseline for comparison while production keeps running. How good the golden image is, will directly influence inspection performance, so it has to be chosen carefully.
After that, inspection sensitivity is adjusted based on the printing application, the substrate type, the level of print quality expected, and the production speed itself. When sensitivity is set properly, the system can catch important defects while at the same time reducing false alarms.
You can also set up inspection zones inside the software. Some critical areas like barcodes, expiration dates, serial numbers, and logos may need more strict inspection parameters than the background graphics do.
Finally, software updates and algorithm optimization matter a lot for keeping inspection performance steady over the long term. Newer software often helps with processing speed, improves defect recognition accuracy, and supports overall system stability.
6. Encoder and Sensor Calibration
Encoders and sensors help sync image capture with the actual motion of the printing press or the web transport mechanism. When everything lines up, the system pulls images at the right spots, even during high-speed output.
Encoder calibration checks that the moment of image acquisition matches the movement of the web precisely. If synchronization is off, the results can be messy, like image distortion, overlapping inspection regions, or even missed defects.
Registration sensors also need careful alignment to keep print tracking stable. These sensors read registration marks, or determine print positions, and then they trigger the inspection sequence when the proper point is reached.
Routine calibration of the encoder and sensor setup is especially important in fast printing environments. In those cases, even small timing errors can lower inspection accuracy noticeably.
7. Validation after Calibration
After the calibration process is completed, the system should undergo validation testing to confirm its performance. Controlled defect samples are often used to verify that the inspection system can detect various defect types reliably, and yes also consistently.
During validation, operators evaluate the system’s ability to identify defects like missing print, color variations smudges, streaks, registration errors, and barcode problems. The false alarm rate should be monitored carefully as well, so that production efficiency stays stable.
Overall, validation testing helps confirm that all the system components are working together properly, and that the calibration settings are tuned for real production conditions.
Maintenance Procedures for 100% Print Inspection Systems
1. Daily Cleaning of Optical Components
Optical cleanliness is one of the most important factors affecting inspection accuracy ,and honestly it can change results faster than people expect. During printing operations, dust ink mist paper fibers, and airborne particles can pile up on camera lenses protective glass covers and optical sensors.
When the optical surfaces get contaminated the image becomes less sharp, and defect detection can get disturbed. Maintenance personnel should regularly clean all optical components using approved cleaning materials made for sensitive optical equipment.
If you do the cleaning carefully it helps keep a clear image capture, and inspection performance stays steady, while also preventing scratches or other harm to delicate lens surfaces.
2. Camera Inspection and Stability Verification
The camera system should be checked frequently so that image quality stays consistent across production. Maintenance personnel should verify that images are properly focused, correctly aligned, and also free from distortion.
Even small shifts matter, so re-checking frequently is usually better than waiting too long.
Mechanical vibration from nearby machines, or continuous production movement, can slowly nudge camera positions over time, so the alignment changes may not feel dramatic at first, yet still reduce inspection accuracy, especially when high resolution details are involved.
That is why camera mounting brackets and the support structures beneath them should be checked closely, to confirm long term stability , and not just at the initial setup.
3. Maintenance of the Lighting System
The lighting system is crucial for image sharpness and how clearly defects appear. Consistent and even illumination matters a lot for reliable inspection results, since changes in light conditions will directly disturb image contrast and also color steadiness.
Over time, LED lights, or other illumination sources, may gradually lose brightness, or they may produce uneven lighting fields. Maintenance should therefore cover regular evaluation of the light intensity, the uniformity, and whether the fixtures are staying firmly mounted.
Lighting surfaces should be cleaned on a regular basis too, because dust or ink contamination may actually lower the illumination efficiency. Also, swapping out aging light sources before the performance drops too much helps keep inspection conditions steady, and not suddenly shift while you are running.
4. Inspection of Sensors and Encoders
Sensors and encoders, synchronize image capturing with the movement of the printed web or the substrate. Getting the timing right is essential for capturing images at the correct position when production is moving fast.
Maintenance should therefore include, checking sensor alignment. checking signal stability and confirming encoder accuracy as well. Loose connections, contamination, or mechanical wear can disturb synchronization and end up causing distorted images, or even missed inspection areas.
Doing periodic verification also makes sure the web inspection system for printing quality keeps accurate timing and tracking during ongoing production tasks.
5. Software Maintenance and Optimization
In a print inspection system, the software handles image analysis, defect recognition, alarm creation, plus data storage. Keeping up with the software performance is just as important as keeping the hardware parts running smoothly.
Updates for the software should be installed regularly, to raise system stability, improve inspection algorithms, boost processing speed, and strengthen cybersecurity defense. Newer software versions often add better ways of identifying defects and provide improved compatibility with today’s production setups.
Inspection parameters should also be revisited periodically, so they stay optimized for current production needs. When substrates change, or ink types shift, or print designs evolve, or production speeds increase, the inspection sensitivity settings might need adjustment, too.
Staying on top of backing up inspection data, configuration settings, and reference images is another key part of software maintenance. Solid backups keep production data safer and can make it easier to recover later, if hardware or software failures show up.
6. Cooling System Maintenance
Print inspection systems depend on computers, processors, and electronic control units that keep running and therefore produce heat. Good cooling is needed so the electronic performance stays steady, and to avoid overheating.
Cooling fans, air filters, and the ventilation system should be checked , and cleaned on a regular schedule, just to keep the airflow where it needs to be. If dust piles up inside the cooling system it may lower efficiency, and internal temperatures can climb.
When the system runs hot, you can see instability, slower processing, surprise shutdowns, and even permanent harm to electronic components. Keeping the cooling section clean and working well is, in the long run, a major factor for overall system dependability.
7. Mechanical Inspection and Vibration Control
Mechanical stability is essential for accurate image capture. Excessive vibration can affect camera alignment, lighting steadiness, and image crispness. This is more noticeable in high speed printing environments, where tiny changes compound.
Maintenance procedures should include looking at mounting frames, brackets, and mechanical supports for looseness or signs of wear. The web handling systems should also be reviewed, so the substrate moves smoothly without extra tension variation, or vibration riding along with it.
By reducing mechanical instability, you help keep inspection results consistent, and you avoid gradual calibration drift that is easy to miss at first.
8. Environmental Maintenance Considerations
Environmental conditions can influence the performance of a print inspection system in a real way. Dust, humidity, temperature fluctuation, and airborne contaminants may all impact optical parts and electronic components, even when the equipment looks clean from the outside.
Keeping a spotless production environment helps reduce contamination buildup and also lowers how often maintenance is needed. With steadier temperature and humidity settings, electronic reliability improves, and color review stays more consistent too.
In places where dust levels are high or where conditions are harsh, maintenance might need to happen more regularly, so inspection performance stays stable.
Common Problems and Troubleshooting in Calibration and Maintenance of 100% Print Inspection Systems
The following chart provides the frequently encountered problems and the troubleshooting methods during the process of calibration and maintenance of 100% print inspection systems.
| Common Problem | Possible Causes | Impact on Performance | Troubleshooting Method |
| Blurry Inspection Images | Dirty lenses, incorrect focus, camera vibration | Missed small defects and reduced image clarity | Clean optical components, refocus the camera, stabilize mounting structures |
| Excessive False Alarms | Improper sensitivity settings, unstable lighting, incorrect calibration | Frequent production interruptions and reduced efficiency | Adjust defect thresholds, recalibrate the system, stabilize lighting conditions |
| Missed Defects | Low inspection sensitivity, poor image resolution, incorrect camera alignment | Defective products may pass inspection | Increase sensitivity settings, verify resolution, realign cameras |
| Uneven Image Brightness | Aging LEDs, improper lighting angles, contaminated light covers | Inconsistent defect detection across the inspection area | Replace aging lights, adjust lighting positions, clean illumination surfaces |
| Color Detection Inaccuracy | Improper color calibration, environmental lighting changes | Incorrect color approval or rejection decisions | Recalibrate using certified color references and stabilize lighting conditions |
| Image Distortion | Encoder synchronization errors, unstable web movement | Misaligned inspection images and inaccurate analysis | Recalibrate encoders and improve web handling stability |
| Inspection Delay or System Lag | Overloaded processors, insufficient memory, overheating | Slower defect detection and unstable system operation | Clean cooling systems, upgrade hardware, optimize software performance |
| Camera Misalignment | Mechanical vibration or loose mounting brackets | Incomplete inspection coverage and inaccurate positioning | Tighten mechanical supports and perform camera realignment |
| Barcode Reading Failure | Poor print contrast, incorrect lighting, low resolution | Unreadable or rejected barcodes | Optimize lighting, improve image resolution, recalibrate barcode settings |
| Sensor Trigger Errors | Misaligned sensors, contamination, unstable signals | Incorrect image capture timing | Clean sensors, verify alignment, inspect signal connections |
| Encoder Signal Instability | Worn encoder components, loose wiring | Synchronization errors during high-speed production | Inspect wiring, recalibrate or replace encoder components |
| Software Crashes or Freezing | Outdated software, insufficient storage, system overheating | Production downtime and inspection interruption | Install updates, free storage space, inspect cooling systems |
| Inconsistent Inspection Results | Parameter drift, unstable environmental conditions | Reduced inspection reliability | Recalibrate system settings and stabilize environmental conditions |
| Poor Detection of Fine Defects | Low camera resolution, improper focus, inadequate lighting | Small defects remain undetected | Increase image resolution, optimize focus, improve illumination |
| Frequent Recalibration Requirements | Mechanical instability, environmental vibration, aging components | Increased maintenance workload and downtime | Improve machine stability and replace worn components |
| Overheating of Electronic Components | Blocked ventilation, dust accumulation, cooling fan failure | Reduced hardware lifespan and system instability | Clean ventilation systems and replace faulty cooling fans |
| Uneven Web Tracking | Incorrect web tension, unstable transport system | Distorted image capture and inaccurate inspection | Adjust web tension and inspect transport rollers |
Summary
For 100% print inspection systems, effective calibration and maintenance is crucial if you want accurate, steady, and dependable performance. When printing companies regularly calibrate the cameras, lighting setups, sensor units, and software settings, they can keep the defect detection precise and stay on track with high product quality goals.
Also, preventive maintenance reduces unexpected downtime, helps extend equipment lifespan, and boosts day-to-day operational efficiency. Since the printing technologies keep moving forward, intelligent calibration and routine maintenance will matter even more when it comes to maximizing the performance of modern printing inspection systems.